

Instant Pot Macaroni and Cheese with Ham and Peas is a simple dump-and-go mac and cheese recipe that’s made entirely in the Instant Pot. Plus, there’s no need to make a separate sauce.

One of the best things about the Instant Pot is that you can make delicious, easy one-pot meals. This Instant Pot macaroni and cheese with ham and peas is a super easy, super tasty dinner that’s ready in less than 30 minutes.
This mac and cheese is also a great way to repurpose leftover ham into a new meal. Add a simple green salad, and you have a quick dinner that’s perfect for weeknights!
How to make Instant Pot macaroni and cheese with ham and peas
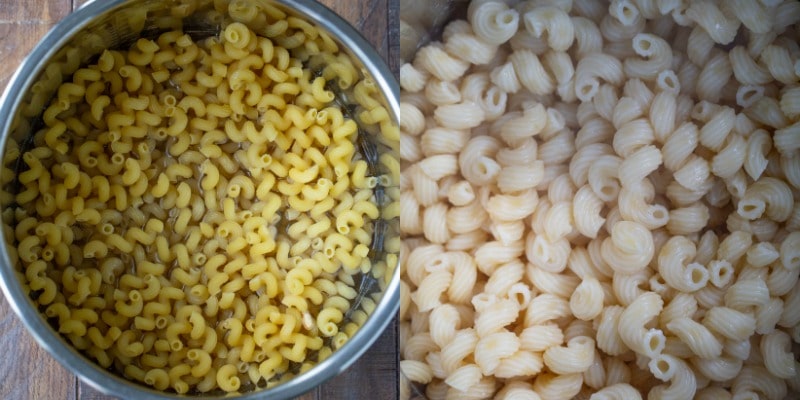
Step 1: Add pasta to the inner pot of the pressure cooker.
Step 2: Add enough water cover pasta by 1 inch. Depending on the shape of the pasta, it usually takes 3-5 cups of water.
Step 3: Lock lid in place, and turn pressure release valve to SEALING. Cook on MANUAL/HIGH pressure for 3-4 minutes.
Tip >> If you’re using larger pasta, choose 4 minutes. If you’re using smaller pasta, like elbows, choose 3 minutes.
Step 4: Carefully turn pressure release valve to VENTING. Unlock lid, and drain pasta. Return pasta to inner pot.
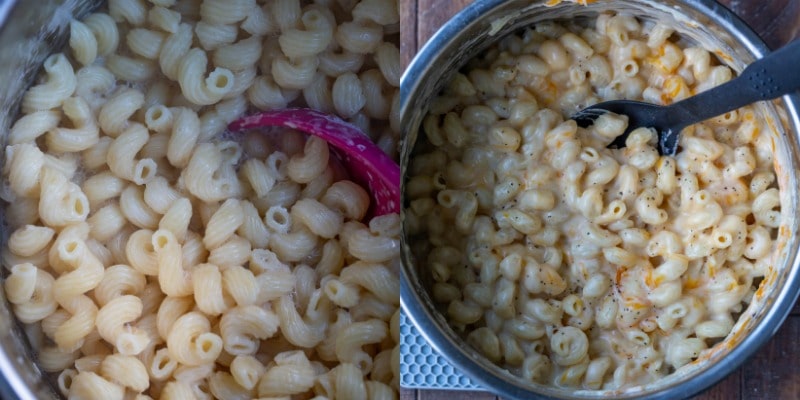
Step 5: Add milk, salt, pepper, and dry mustard and stir to combine. Press CANCEL.
Step 6: Stir in cheese, and continue stirring until cheese has melted and is combined.
 Step 7: Stir in diced ham and frozen peas until combined.
Tips
- Pasta: I like to use cavatappi. If you use another type of pasta, you may find that you need to adjust the cooking time.
- Evaporated milk: You can use regular, low-fat, or fat-free.
- Mustard: If you don’t have dry mustard, Dijon mustard makes a good substitute. I use about a teaspoon or so if I’m using Dijon mustard.
- Cheese: I’ve used a number of combinations of cheeses. Feel free to use the types of shredded cheese that you like.
- Peas: I don’t thaw the peas before using. I recommend checking for chunks of ice before adding the peas so that you don’t end up with watery mac and cheese.

Storage
Store any leftover mac and cheese in an airtight container in the refrigerator. The mac and cheese will keep for up to 4 days when properly stored.
More Instant Pot mac and cheese recipes!
If you’ve tried this Instant Pot Mac and Cheese with Ham and Peas recipe, don’t forget to rate the recipe and leave me a comment below. I love to hear from people who’ve made my recipes!
You can follow me on Pinterest or Facebook for even more delicious food.

Instant Pot Mac and Cheese with Ham and Peas
Equipment
Ingredients
- 16 ounces dry shaped pasta
- 3-5 cups water
- 12 ounce can evaporated milk
- 1/2 teaspoon dry mustard
- Salt and pepper
- 8 ounces shredded Monterrey Jack cheese
- 8 ounces shredded Cheddar Cheese
- 1 ½ cups cooked diced ham
- 1 cup frozen peas
Instructions
- Add pasta to the inner pot of the pressure cooker.
- Add enough water cover pasta by 1 inch. Depending on the shape of the pasta, it usually takes 3-5 cups of water.
- Lock lid in place, and turn pressure release valve to SEALING.
- Cook on MANUAL/HIGH pressure for 3-4 minutes.
- Carefully turn pressure release valve to VENTING.
- Unlock lid, and drain pasta.
- Return pasta to inner pot.
- Add milk, salt, pepper, and dry mustard and stir to combine.
- Press CANCEL.
- Stir in cheese, and continue stirring until cheese has melted and is combined.
- Stir in diced ham and frozen peas until combined.
Notes
- Pasta: I like to use cavatappi. If you use another type of pasta, you may find that you need to adjust the cooking time.
- Evaporated milk: You can use regular, low-fat, or fat-free.
- Mustard: If you don’t have dry mustard, Dijon mustard makes a good substitute. I use about a teaspoon or so if I’m using Dijon mustard.
- Cheese: I’ve used a number of combinations of cheeses. Feel free to use the types of shredded cheese that you like.
- Peas: I don’t thaw the peas before using. I recommend checking for chunks of ice before adding the peas so that you don’t end up with watery mac and cheese.
- Cooking time: For larger pasta, like cavatappi, cook for 4 minutes. For smaller pasta, like elbow macaroni, cook for 3 minutes.
- Nutrition values are estimates.
Nutrition
Disclaimer: Nutritional values were calculated using a third-party tool and are provided as an estimation only.
Sharing this recipe with a link is both encouraged and appreciated. Copying/pasting and/or screenshots of full recipes to any social media is strictly prohibited. Content and photographs are copyright protected.
Did You Make This?
Don’t forget to leave a rating below below and make sure to follow on Pinterest and Instagram for more!


Hi! I made this last night and is was so easy and delicious. Followed the recipe but added some bacon that was going to expire soon. I air fried the bacon and mixed it in at the end. So good! Thank you for the recipe!
Thank you! I’m glad that you liked it!